
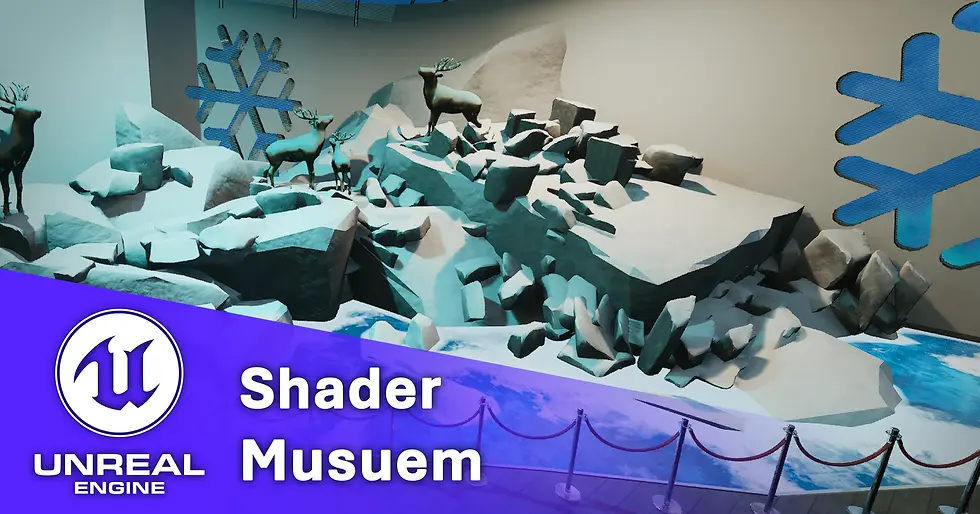
Winter Shader Musuem
- Dec 26, 2025
- 18 min read
Updated: Dec 30, 2025
Introduction:
Hello there, this project is about showcasing a variety of shaders I’ve made over the year in an enclosed museum space. Theres a lot of fun shaders I’ve made that I have yet to upload so I figured this would be a great project to place them onto my portfolio and expand on new shaders I’ve been wanting to make.
Project Brief:

For extra challenge I will be following the university brief for Shader Musuem to limit the scope of this project to about 3 weeks. The key reason is that the longer I give myself to work and polish shaders the higher the chance the project will never be finished nor see the light of day. Let’s outline some key deliverables before I jump into planning:
The project must run in Unreal Engine 5
External meshes are allowed to be used to display the shaders on top of however all shaders must be made by me.
Minimum of 3 shaders need to be made.
Shaders should cover areas of environment, virtual effects such as Niagara and post process.
Graphs need to be well commented, optimised and use minimal texture samples with appropriate channel packing of greyscale maps.
UI interaction must be present within the scene to talk more about the shaders.
A final overview video must be recorded showcasing the museum with narration.
With these deliverables out of the way let’s talk more about the timeframe for this project. Any good project needs a solid plan to get going.
Project Start: 17th December.
Project End:11th January

Total Timeframe: 3~ Weeks (with some excluded busy days)
With the holiday season around I knew time will be limited around Christmas days, so I have made a small plan document to focus my time for shader creation. In spirit of the season, I have also chosen a theme for the scene to be shaders based around the 4 seasons. Due to time constraints, I have cut it down to 3 and may need to trim it further to 2 if the shaders take longer to make than intended.
Now onto the research!
Research:

I first conducted some research into previously created shader museum projects to get an idea for scope. I looked at Molly Oakley, Ana Iancu and Nina Klos projects. I really liked the room layout that Molly used to create clear displays of each shader and how they work on geometry. The parallax effect of the gemstones in particular looks great and I want to tackle similar layering in my own scene. When looking at Anas Iancus project the ice in particular was broken down very nicely and also thematically setup in a compelling way. I will definitely attempt my own style of ice to fit into the winter season however I am uncertain on what this may layer on. In Ninas scene I also like the layout of the museum and how each effect builds into the sea theme. The sand, water and fish scales all work well together and the lighting in this scene is great at focusing the player to those zones. Water is a challenging but rewarding shader that I want to attempt, and I will be inspired by the way it’s been displayed well in Ninas scene.

After researching I took to some blocking out to plan the layout alongside what shaders I could make.
Planning Floor Layout:
I quickly drew a few sketches of how I could layout the floor. I wanted the primary focus between the seasons to be the tree in the centre, so I spaced out elements across a semi-spherical space similar to an enclosed museum layout. The open space would give me enough area to showcase varying shaders in different states of the seasons.

What Shaders I Could Do:
As seen here I jotted a variety of shaders, VFX and post process I could do to transition between the different seasons whilst keeping the same underlying meshes. This should help cut down on new geometry that would need unique shaders. A lot of the shaders should share the same logic to create too such as the puddles shader of fall could be like snowfall in winter. Just with different roughness and colour values. Furthermore, the VFX particles could share logic like the snowfall and butterflies being particle effects with alpha cards just flying in different directions. The most complex shader and effects combo would be the waterfall as its quite dynamic in its states between frozen and flowing.
Building Blockout:

I used this modular art showcase kit by Dekogon Studios to place walls and floors to make my layout in Unreal engine. It also came with lights and railing fencing that you would see in museums that would work perfectly with a spline blueprint. Making it easier to place and fence off important zones.

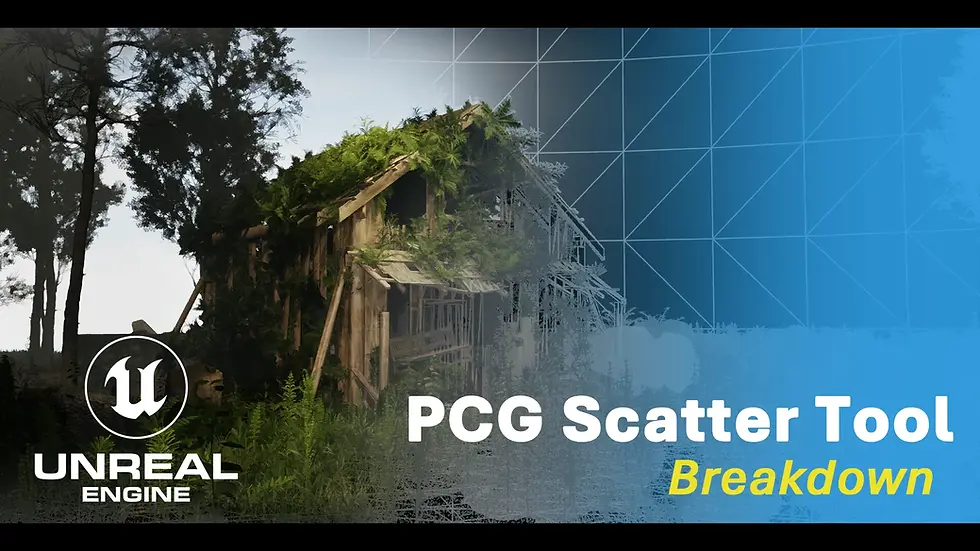
For the rocks I found a kit by PixelForgeESP that had a variety of shaped rocks. I did not care for the textures but rather the shapes available as I could plug them into my clutter PCG tool to make a rock wall in engine automatically.
Checkout my full breakdown of that tool here: https://www.jolchawa.site/pcg-scatter-tool

I then took an overhead view to paint over and adjust placements. I initially had the tree in the centre but realised this blocked a lot of the views of the rocks and waterfall on the left.

So, I removed it and will instead have it feature in its own nook in the corners. I really liked this design with more walls to section off shaders to their own zones which should make exploration easier to understand. As the asset affected by shaders should be closer to where they are being used.
Day 2 – Ice Floor Shader

My first shader to tackle was the ice floor shader to help build a foundation for my other water effects. Being the winter day, I exported some planes and built out the pond area below the rocks. I needed some noises to buildup my logic of ice layering, so I went into Designer to export some bubble layers, top snow layers, and surface scratch noise.

To investigate how the depth effect is done I read this article by Taizyd Korambayil were used in their ice graph. I saw that a bump offset node worked similar to a parallax occlusion effect however had more freedom in choosing the depth the layering occurred. To make the ice my own however I didn’t want it to be just layered effects, I wanted more interaction between the ice affecting the meshes on the surface too. To do this I used the generated mesh distance fields to apply the ice top white layer to intersections. For testing I use highly colourful values here’s how it looked at varying stages:

I then layered the bump offset designer noises with Lerp masks for colour and tiling control. You may notice there is some translucency as this shader is not opaque this is on purpose as I want there to be see-through parts of the ice. Below the ice I wanted to add some fish on simple planes. They only move slightly with a wiggle on WPO movement so I will need to polish them later with further maps, more WPO gradients and masking.

Day 3 – Snow Piling Shader and Planning Restructure

Starting off today I realised just how long it is taking me to make shaders for just the winter portion and that my planned availability has actually shrank by a week. This affects my plans massively as I can no longer do the later weeks for which the other seasons are planned and have become over scoped. To make this project make sense I will instead purely focus on winter shaders for the entire duration and may expand the museum in the future for the ones I have cut out. I will also need to wrap this project up by the 28th of December so I will instead be spending 14 days total working on it. The remaining work I want to do: Snow pile shader, snow floor shader, aurora borealis, ice sculpture and waterfall. For particle effects I will keep it to a simple snowfall, but I want to tie both post process and snow to a blueprint, so they work together when they are made later.

Snow piling shader uses a variety of masks the first being vertex normals. I originally debated using world position for this as it had a better blend effect on edges however realised it would limit the ground plane as it would be the same for all rocks. Instead, the top direction normal is the mask, and this effect works even better on meshes with more geometry. The pack I'm using is highly optimised and low poly which has caused some odd shading artifacts. Furthermore, I tried to use the same distance blend masks as my ice floor but realised it didn't add that much snow back on and it doesn't make sense for more snow to appear in overlap for rocks if anything it should be less.

The final touches were exposing the textures as parameters to allow this shader to also work on props not just tiling rocks. I did encounter some problems with height using it on these low poly rocks as height depends on my normal direction mask which when in low poly vertices is quite sharp. This forces the vertices to split under WPO, and I could not find a fix for the issue online. I ended up just switching off the behaviour altogether on low poly rocks.

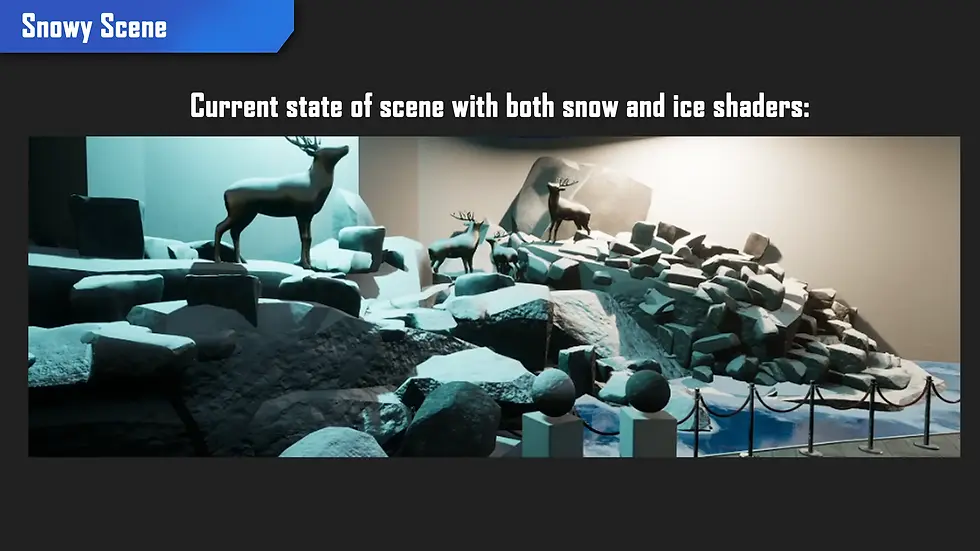
Heres a wider look of the room at the moment:
As a sidenote as there was 30+ rock meshes to assign mats to I wrote a simple blueprint scripted action that assigned the mat automatically to the mesh without opening each editor. It may be if use to you too, here's the blueprint.

Heres a video of it working:
Day 4 - Aurora Borealis Shader and Snowy Branches Shader

The aurora borealis shader also known as northern lights was quite complex to setup as it required specific noises to create the effect. I followed a tutorial by CodeLikeMe up but ended up adjusting the shader to get more control to make longer strips too.

This shader also uses a spline system to place the pieces together automatically here's how that blueprint looks. I did encounter some issues with weird scaling and overlap but resolved them by adding extra controls for how close the pieces spawn together.
My spline blueprint for the aurora and the railing:

Winter Sky Sphere

The aurora looks off without an accompanying sky backdrop. For this shader I used the same panning principles to create a moving clouds effect. The hardest part was eliminating seams for which I used linear gradients to mask of the top and bottom. However, the mesh itself also had to be symmetrical to avoid overlap issues. For the stars I used another noise that slowly scrolls to create the blinking effect and a texture bomb noise to scatter the stars randomly across the sphere. I'm not fully satisfied with the stars but will leave it as is for now.
Foliage Snow Branch Shader

For this shader I used similar effects to the rocks to grab the normals of the branches. This did produce a very predictable snow effect, so I instead used the tangents to multiply the radial snow sphere masks size to slightly have a different result per branch. This combined with an override snow pile mask from world position allowed a much more organic growth of snow on the mesh. Unfortunately, however the branches were too low poly to have a lot of height on, so I limited this WPO effect.

Day 5 – Snow Floor Shader

This shader causes me the most issues by far due to a misunderstanding of how the normals part of a Fresnel node works. My assumption was that if left unconnected the node works only on the mesh normals placing a Fresnel on the edges. Unfortunately, after hovering the node, I saw it instead grabs the pixel normals aka the final texture normals instead. This meant my plan to automatically blend detail normals texture intensity out with Fresnel wouldn't work as it ends up in a feedback loop. I ended up using camera distance fade to setup a gradual blend effect to cancel out granular noise from close up detail normals. I also made some glittering effects inspired by this tutorial here on snow. It's subtle but makes the snow interesting to walk closer towards.

Day 6 - Ice Sculpt Shader and Museum Walls Adjustment

After making an icy floor I realised I wanted to make a more thicker ice shader that could be used for sculptures or prop meshes. My original shader was getting heavy in instructions and adding more samples to it felt like a bad idea, so I started fresh. However, I realised that there was little room at this point to setup meshes and the shader as I worked so I had to adjust the layout. I added an extra set of doors that currently do not open but lack collision is you can clip through. This new section will contain VFX and rigging if I get to it. The wider walls allow easier display of the ice shader so let's get back to making it.

This shader takes a lot less bumps offset layers as the original floor ice shader, focusing more on Fresnel and opacity. I wanted an opaquer translucent effect that favours subsurface scattering. This is the effect of light passing through a mesh when close by and the output for the translucent effect matches well with the subsurface thickness. For the colour of subsurface I intensified the original base colour with a reverse desaturation node.

This shader looks best when viewed close to light to have that subsurface shine through but is not without its issues. The first being odd artifact on the backside of the mesh. I assume this is due to the seams of the noises and the fact that front shading at full opacity will not shade correctly. I found a video on this issue by TechArtRaid.

Unfortunately the fix is to use masked mode with dithering but the opacity result is not smooth due to the dithering hatching effect. I ended up ignoring the issue as its not too notable on most meshes and explored making a fully opaque shader variant on the right instead. I managed to match it quite close to the original but it does lose a bit of that see-through glassy look as its not translucent.

Day 7 – Interaction Blueprints and Graph Cleanup

As I saw some interesting roles pop up recently I wanted to use today to cleanup my graphs for posting, make a quick video flythrough and create some interaction blueprints. The interaction graphs especially will help me meet all my requirements for the project to be successful.

I needed two interaction graphs, one for the post process and the second for the inspection press E event. I first started on the post process volume as it was easier to get working. The logic behind this graph is that it detects when a player presses E close to the wall which toggles one post process volume on and the other off. To make the transition more obvious the wall also glows in green text depending on its state so the material is also switched on the text renderer at the same time. I used flip flop nodes as there only has to be two states; on or off for this graph. Here’s a clip of it working and how the graph looks:
For my second interaction graph I needed a image and text to appear about each shader when pressing E close by the shader balls. To make this graph reusable I would need to expose parameters for image, text title and description so they can be edited in the level on the blueprint instance. To begin I made the blueprint using similar logic as the previous one for detecting when the player presses E inside the collision zone. I then created a slate widget for the UI element and nestled both images and the interaction button key in vertical/horizontal boxes.

These boxes help ensure that despite changing screen resolutions the elements should remain in similar zones in the middle of the screen. For the press E text I was originally thinking of hiding and unhiding the middle folder box to get rid of the text but this would also require changing the text to state press e to interact then press e to hide.

To make it simpler I copied the widget and deleted the centre text so this one simply prompts the player to press E if desired. I have a temporary picture of a cat for now but will change it out for the final shader graphs when complete.
Speaking of shader graphs, I needed to cleanup my graphs so I could create a quick WIP post to help apply to some roles so I took the evening to apply my parameters final values to the main graph, rename and group graphs with good comments. Annoyingly there is no feature to push the adjusted values to be the default ones which I understand could cause a user to overwrite a master graph, but it would have been a nice feature. I manually detangled and fixed the graphs up.
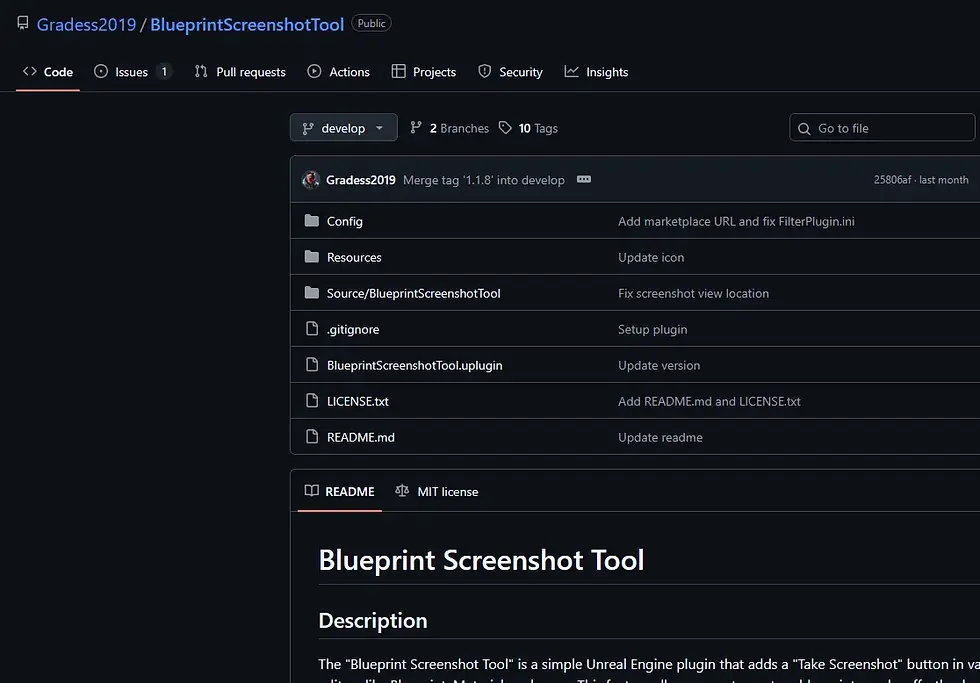
To help get high quality screenshots I downloaded this plugin by Gradess2019 which has been a great help since the website I usually use called BlueprintUE has been blocked by the UK government for some reason. It stitches together a series of screenshots over the entire graph. It's what you have seen so far on this blog!
Day 8 – Post Process Shader and Snow VFX Blueprint

Today I wanted to work on a different sort of shader – post process. I have setup the interaction event before so I created a blank material and set to work. I wanted to create a icy overlay that would blur the screen a bit in the centre. Fortunately, my previous shaders meant I had the noises available and I got to work.

I used this great tutorial by Ben Cloward to create a blur effect which I then blended with my ice to make a more realistic overlay. I wanted to also add a bit of chromatic aberration to distort the colours like water drops on a camera lens however I saw that it would need to callout scene texture nodes before the blur for each channel making it quite expensive to split and create.

Here’s how it looks in the level:

I also wanted to push the effect of it being cold and snowy by adding snow VFX so I followed a tutorial by Unreal ART With Alireza.

As the snow was quite simple, I wanted to jazz it up by tying it to the post process blueprint so it would automatically come on when triggering, making the ice overlay make more sense.

I ended up creating an array that cycles through all the added Niagara snow systems in the level to make it robust for adding more snow in level at any time. Here is how it looks:
I also took today to fix some shaders, the ice and aurora borealis. I was not too happy with the scale of the aurora effect as it felt too small to me, so I adjusted it to make it wider and enabled the longer strands to work from the blueprint too. As for the ice floor I didn’t like how there was not any cracks, so I packed some cracks into the alpha channel as it wasn’t being used anywhere else.

Day 10 – Waterfalls, Mossy Rocks and Fish Tornados

To make the waterfall shader I first needed to make the water it would pour into. I changed up the secondary room to have a small pond area rather than a rigging platform. I initially wanted to rig a mesh as part of this project to animate towards the player via a IK specifically the deer. However, with the limited time available I won’t be able to do so and will instead move that to its own project in the future.

For the pond I cut it out of the floor tile and reused the plane from the ice floor to create the water. To start I reused logic from the ice shader to use mesh distance fields to detect the edges. I then use scene depth to colour the water at varying depths and fade the opacity the deeper it got. For moving waves and foam I used panners to animate my textures which I masked from both scene depth and edge detection. I wanted algae to form around foliage I have found from this pack here from Quixel Bridge to make a more natural composition. I also added some simple panning caustics on a light function to make the depth effect more convincing here’s how the result looks:
Inside the water I also polished off the fish movement by isolating more of the WPO masks with painted zones for the fishes’ fins and tail. Combined with offsetting the space the fish also occupied the swimming motion became more randomised and convincing. I also added a rotation node to move sway the wish around however during testing I accidentally set the value too high and created a fishnado:
After some adjustment here’s how the final graph looks like now with full PBR maps for the fish!

You may notice the rocks also have moss which was an incidental shader I made from a duplicated master copy of the snow shader. I wanted edge detection and finer moss noises to create colour rather than reuse the snow shader with a flat moss colour, so I adapted it as shown here. The result has finer control and better noises from existing channel packs.

To make the waterfall effect I first reused the aurora borealis (northern lights) spline and mesh however scaled it down significantly. I positioned it over an arrangement of rocks and went to work animating a waterfall noise scaling down via a panner. I knew I wanted foam, so I used the same edge detection mask from the water algae however masked a more softer foam spray corner.

For the bottom of the spline, I used world position to fade out the waterfall so I could insert a simple steam VFX made from an adapted Niagara fountain preset. The ripples in the water were a challenge as I was uncertain how to animate the fade out effect. Fortunately, this tutorial by PrismaticaDev on distance fields showcased a sine input to the mask multiplied with time which creates a ripple effect. However, it also creates large flashing white blots which I struggled to mask out.

The method I ended up using has uses another sine to create a mask at the maximum and minimum distance ripples occur. This masks out the flashing effect. The second problem zone was actually creating the ripples via distance fields. I ended up having to disable all but the bottom rocks from affecting the waters distance fields and insert a mesh that is toggled not visible in game but rendered in main pass to make an invisible sphere that ripples out. This creates the illusion of water from the spline hitting and rippling the plane below. The steam VFX was a modified version from this tutorial by Peyton Varney with larger particles that evaporated higher and with a curl noise had a more randomised spin when spawned out. Combined together the result came out great.
At the end I also encountered a issue with rendering my translucent materials being poorly overlapped. So I ended up having to add some higher priority sort order ids to my steam particles to ensure they are not rendered behind the waterfall or the water below them. This resolved the issue.

I also hanged an AC unit created by Daniyal Malik above the door to have a space to showcase the snow all the time. Now with all the shaders and VFX done its time for some renders tomorrow!
Day 11 – Final Renders and Project Postmortem
I exported and assembled all my renders below:
Project Post Mortem:

To review over the course of two weeks for this project, I was able to create shaders for:
Snow pile
Snow branches
Snow floor
Ice floor
Ice sculpture (translucent and opaque)
Water (+ Caustics)
Waterfall
Fish (no longer tornado)
Mossy Rocks
Northern Lights
Winter Sky Sphere
For two strict weeks I am quite pleased with my progress to create 10 dynamic shaders. My most complex and difficult shader was the waterfall combining masking to fit dynamically with the water below and steam particle effects. My most troublesome shader was the snow pile shader as I was unable to resolve the mesh detachment issues the vertices had on a low poly mesh (I just added a toggle to disable it on those meshes).
I also once again struggled with time management as my original idea was very over scoped. On the positive side I identified this relatively quickly and made the necessary cuts so I can still succeed to meet all my requirements. For my next project I will attempt to curb my over scoping and push my portfolio with topic such as rigging and asset automation.
3D Assets Used in Project:
Barresi, Dario. “Cedar Bridge 2 HDRI • Poly Haven.” Poly Haven, 1 Nov. 2025, polyhaven.com/a/cedar_bridge_2. Accessed 25 Dec. 2025.
Fab. “Art, Fashion, Automotive Galleries and Showcases.” Fab.com, 2025, www.fab.com/listings/a85dcedb-f434-4ed3-bc25-6a9b302e6d1c. Accessed 25 Dec. 2025.
---. “Pine Tree (FBX 4K).” Fab.com, 2025, www.fab.com/listings/df93f478-b26c-4ee4-9be5-69a7dba43f05. Accessed 25 Dec. 2025.
---. “Rock Environment Pack.” Fab.com, 2025, www.fab.com/listings/06a642fd-6639-4831-9230-18c91cae5ec2.
---. “Stag Statue.” Fab.com, 2025, www.fab.com/listings/a409581a-3229-460e-b19f-d14728fc99e1. Accessed 25 Dec. 2025.
Kumar, Amal. “Ganges River Pebbles Texture • Poly Haven.” Poly Haven, 1 Jan. 2023, polyhaven.com/a/ganges_river_pebbles.
littleicon. “Download Free E Key Icons in PNG & SVG.” Freepik, 2024, www.freepik.com/icons/e-key. Accessed 25 Dec. 2025.
Papatson Prapan. “Top-down Aerial View of a Vibrant Orange Butterfly Koi Carp with Elegant, Long Flowing Fins Gracefully Swimming on an Isolated Background.” Vecteezy, 2025, www.vecteezy.com/png/70182341-top-down-aerial-view-of-a-vibrant-orange-butterfly-koi-carp-with-elegant-long-flowing-fins-gracefully-swimming-on-an-isolated-background. Accessed 25 Dec. 2025.
Tuytel, Rob. “Wood Planks Grey Texture • Poly Haven.” Poly Haven, 1 Jan. 2021, polyhaven.com/a/wood_planks_grey.
Malik, Daniyal. “Air Conditioner.” Sketchfab, 28 June 2017, www.sketchfab.com/3d-models/air-conditioner-777cbe0d26aa4f1588050419ec24f4e4.
Quixel Bridge. “Rembrandt Water Lily.” Fab.com, 2024, www.fab.com/listings/96391dd8-2556-47cf-a3ff-de5634adf19d. Accessed 23 Dec. 2025.
Research Bibliography:
Ben Cloward. “Blur and Sharpen Filter - Shader Graph Basics - Episode 51.” YouTube, 23 June 2022, www.youtube.com/watch?v=c30uBsyMnNY. Accessed 25 Dec. 2025.
CodeLikeMe. “Unreal Engine 5 - Aurora/ Northern Lights Tutorial.” YouTube, 29 June 2023, www.youtube.com/watch?v=QMoJvMkrorI. Accessed 23 Dec. 2025.
Tech Art Aid. “UE4: How to Fix Translucent Materials (Dithered Opacity).” YouTube, 28 May 2016, www.youtube.com/watch?v=ieHpTG_P8Q0. Accessed 25 Dec. 2025.
Iancu, Ana. “Shader Museum - North Pole Edition, Ana Iancu.” ArtStation, 2025, www.artstation.com/artwork/DA552E. Accessed 25 Dec. 2025.
Klos, Nina. “Shader Museum, Nina Klos 🐟.” ArtStation, 2025, www.artstation.com/artwork/D5O2oA. Accessed 25 Dec. 2025.
Oakley, Molly. “Crystals Shader Museum, Molly Oakley.” ArtStation, 2025, www.artstation.com/artwork/o2NB0B. Accessed 25 Dec. 2025.
Persson, Katarina. “Aurora Borealis: Breakdown, Katarina Persson.” ArtStation, 2025, www.artstation.com/artwork/D58yoE. Accessed 25 Dec. 2025.
PrismaticaDev. “Vertex Normal WS Node | 5-Minute Materials [UE4].” Www.youtube.com, 5 Feb. 2021, www.youtube.com/watch?v=sGuJxr4Bfxw. Accessed 23 Dec. 2025.
PrismaticaDev. “Distance Fields (Part 1) | 5-Minute Materials [UE4/UE5].” YouTube, 12 July 2021, www.youtube.com/watch?v=yzvq8aonDYQ. Accessed 23 Dec. 2025.
Peyton Varney. “Making Smoke Particles in Unreal Engine 5 - Niagara Tutorial.” YouTube, 6 June 2024, www.youtube.com/watch?v=omDpFnDi9fs. Accessed 23 Dec. 2025.
Spivak, Daniil. “Setting up a Detailed Snow Shader in Unreal Engine 5.” 80.Lv, 80lv, 27 Nov. 2025, 80.lv/articles/setting-up-a-detailed-snow-shader-in-unreal-engine-5. Accessed 25 Dec. 2025.
Taizyd Korambayil. “Developing Artistic Ice in Unreal Engine 4.” 80.Lv, 80lv, 16 May 2017, 80.lv/articles/developing-artistic-ice-in-unreal-engine-4. Accessed 23 Dec. 2025.
Tech Art Aid. “UE5: World Position Effects in Materials // Unreal Engine Tutorial.” YouTube, 29 May 2021, www.youtube.com/watch?v=46LtpJolSd8.
Unreal ART With Alireza. “How to Make Snow in Unreal Engine 5 Using Niagara.” YouTube, 10 July 2023, www.youtube.com/watch?v=p9_H912sZuk. Accessed 23 Dec. 2025.
Gradess2019. “GitHub - Gradess2019/BlueprintScreenshotTool: The Tool to Take Screenshots of Graphs inside Blueprint Editor and Blueprint Diff Window.” GitHub, 20 Nov. 2025, github.com/Gradess2019/BlueprintScreenshotTool. Accessed 23 Dec. 2025.
Comments