
Maxscript May Development Journal
- May 3, 2025
- 36 min read
Updated: Jun 18, 2025

What is Maxscript May?
This year I decided to hop onto a challenge to brush up on my Maxscripting skills. I'm calling it Maxscript May, and I shall challenge myself to weekly create brand new or previously improved Maxscript tools for use by artists, students or myself.
These will be standalone scripts that short and hopefully will come with some documentation too if I have enough time to write it up. However short disclaimer, I have been having quite a lot of fun with scripting in Python so I may substitute it as my language of choice for a tool should I find it easier to work with as I noticed the command terminal accepts Python too.
Furthermore I can see quite a challenge with my schedule as I will be busy marking for some period of time alongside other freelance duties so I will try my best to utilise weekends to create effective, short and hopefully fun tools to use.
To keep all entries easier to read I will add them below to this same blogpost as time goes on, so keep on reading for some fun scripts and how I made them!
Week 1 - Mesh Checker Tool

What is it and why?
As a lecturer one large issue I run into during marking is NGONS. Unfortunately this has a domino effect on student unwraps later down the line and can get even worse if the NGONS are merged into overlapping vertices from a symmetry modifier gone wrong. This tool will help both students and me find ngons so they can be eliminated at all costs.
Initial UI Concept:

To get a better understanding of what variables I may need I hopped onto Photoshop to draw up a UI concept. To make it easiest to understand what meshes failed or succeeded checks I have gone with two columns. After a user has completed the check, they can select a mesh on the left to breakdown into more data below such as number of ngons, overlapping and isolated vertices.
Maxscript UI Builder

I used 3DSMax's inbuilt UI builder for the rollout before doing any scripting. I managed to quite closely match my concept by using listboxes and regular buttons. As for the link I may need to look into a invisible button of a sort to let it become clickable as I could not spot a link option.
Adding Selection and Sorting with ListBox
To begin I wrote some lines to enable the btn_refresh_sel to work so I can gather data from selection. I then ran into my first hurdle of never having used listboxes before so I searched across the documentation and found this great page (comes with a example too (3DSMax, 2025)). I was then able to write a function that could take the names of selection, check for ngons and then add them to the correct column!
Script Progress 02.05.2025
--global ngonflag=false

global arr_failed_items=#()

global arr_succeeded_items=#()


fn NGONFinder selectobj =

(

	max modify mode

	local int_subobject_level=subObjectLevel

	local NGonCounter=0

	print subObjectLevel as string

	subObjectLevel = 4

	PolyToolsSelect.NumericFace 4 3 false

	numberofselectedngons=selectobj.GetSelection #Face

	NGonCounter+= numberofselectedngons.numberset

	setFaceSelection selectobj #{}

	local ngonflag=(numberofselectedngons.numberset>0)

	subObjectLevel=int_subobject_level

	if numberofselectedngons.numberset>0 then

	(

		print"i did detect ngons"

		appendIfUnique arr_failed_items selectobj.name as string

	)

	else

	(

		print"i did NOT detect ngons"

		appendIfUnique arr_succeeded_items selectobj.name as string

	)

	format "% has % ngons!\n" selectobj.name NGonCounter

	--else

	--(

	--	ngonflag=false

	--)


)

	--OverlappingVertices.check currentTime selectobj &OverlapVerticesArray

	--IsolatedVertices.check currentTime selectobj &IsolatedVerticesArray

	--OverlapVertCounter=OverlapVerticesArray.count

	--IsolatedVertCounter=IsolatedVerticesArray.count


rollout checker_roll "Checker" width:438 height:446

(

	button 'btn_refresh_sel' "Refresh Selected" pos:[79,51] width:251 height:25 align:#left

	listBox 'lbx_failed_check' "Meshes that Failed Check" pos:[7,87] width:205 height:13 align:#left

	listBox 'lbx_succeeded_check' "Meshes that Succeeded Check" pos:[216,87] width:205 height:13 align:#left

	label 'lbl1' "Select all meshes to analyse  then press button below" pos:[6,32] width:416 height:18 align:#left

	label 'lbl2' "Checker Tool" pos:[10,9] width:268 height:21 align:#left

	label 'lbl3' "Select a mesh from the failed collumn and press button below to analyse" pos:[7,284] width:416 height:18 align:#left

	button 'btn_analyse_failed' "Analyse Selected Failed Mesh" pos:[79,303] width:251 height:25 align:#left

	label 'lbl4' "Mesh Name:" pos:[7,345] width:63 height:20 align:#left

	label 'lbl5' "Triangle Count:" pos:[7,366] width:82 height:20 align:#left

	label 'lbl6' "Vertex Count:" pos:[7,388] width:75 height:20 align:#left

	label 'lbl7' "Scale:" pos:[7,407] width:36 height:20 align:#left

	label 'lbl_mesh_name' "Empty" pos:[73,345] width:106 height:20 align:#left

	label 'lbl_triangle_count' "0" pos:[88,365] width:82 height:20 align:#left

	label 'lbl_vertex_count' "0" pos:[88,388] width:75 height:20 align:#left

	label 'lbl_scale' "0, 0, 0" pos:[45,407] width:83 height:20 align:#left

	label 'lbl12' "NGONs:" pos:[211,345] width:44 height:20 align:#left

	label 'lbl13' "Overlapping Vertices:" pos:[211,366] width:107 height:20 align:#left

	label 'lbl14' "Floating Vertices:" pos:[211,388] width:75 height:20 align:#left

	label 'lbl_ngon_count' "0" pos:[259,345] width:82 height:20 align:#left

	label 'lbl_floating_vertices' "0" pos:[294,388] width:75 height:20 align:#left

	label 'lbl_overlapping_vertices' "0" pos:[320,366] width:75 height:20 align:#left

	label 'lbl21' "Questions? Click here for my documentation" pos:[5,426] width:416 height:18 align:#left


	on btn_refresh_sel pressed do

	(

		arr_failed_items=#()

		arr_succeeded_items=#()

		--local str_selection_names = for o in selection as array collect o.name

		local arr_selection = selection as array

		local int_counter_of_items=0

		for obj in arr_selection do

		(	select obj

			format "made it here"

			if classof obj == Editable_Poly then

			(

				int_counter_of_items +=1

				format"regular\n"

				format "found % of geometry in selection\n" int_counter_of_items

				print obj.name as string

				NGONFinder(obj)

			)

			else

			(

				local str_name_conv_question = obj.name as string +" is not a Editable Poly, convert?"

				try

				(

					if queryBox str_name_conv_question title:"Warning!" beep:true icon:#warning then

					(

						print obj.name as string

						convertTo obj Editable_Poly

						NGONFinder(obj)

					)

				)

				catch

				(

					print"Something went wrong, couldnt convert..."

				)

			)


		--lbx_succeeded_check.items=str_selection_names

		)

	lbx_failed_check.items=arr_failed_items

	lbx_succeeded_check.items=arr_succeeded_items

	select arr_selection

	)

)
createDialog checker_roll
UI Update Selection
As I continued to script more of the functionality I realised there isn't a way to select the analysed faces or vertices that are problematic. I did some digging on the documentation and realised you can input 3DSMaxs existing icons into a button by using iconName and iconSize. I went with @"State\Visible" as the eye should express "seeing" the selection to the user. Here is my UI revision complete with some reshuffling of some parameters.

You may notice I deleted the top title which was made redundant by the script header and the scale breakdown. For this tool, as its only checking the surface I found the scale to break the feng shui of the UI and be useless data to the user.
Adding Documentation Weblink
There is a class called Hyperlink, which does exactly as you may think, go to a link! Check out the documentation block here! (3DSMax, 2025) (Future note I recorded the video after writing my documentation, I am not a timetraveller I swear)
Error Handling
As I realise the user can very easily mess up selection, I ensured my code only accepts Edit Poly by checking if the classof obj == Editable_Poly alongside offering the option to convert to Edit Poly by using a Querybox. Furthmore I used a messagebox to handle my errors by nesting my scripts in Try () and Catch () which is the same as Try, Except I believe in Python. Super useful and makes the script run much smoother by failing silently with print errors.


Final Code and Video:
Heres a video of the final result in action!
And here is the script!
Final Checker Tool Script
--global ngonflag=false

global arr_failed_items=#()

global arr_succeeded_items=#()

global arr_select_ngons=#()

global arr_select_isolated_verts=#()

global arr_select_overlap_verts=#()


fn NGONFinder selectobj =

(

	max modify mode

	arr_select_ngons=#()

	local int_subobject_level=subObjectLevel

	local NGonCounter=0

	--print subObjectLevel as string

	subObjectLevel = 4

	PolyToolsSelect.NumericFace 4 3 false

	numberofselectedngons=selectobj.GetSelection #Face

	arr_select_ngons=numberofselectedngons

	NGonCounter+= numberofselectedngons.numberset

	setFaceSelection selectobj #{}

	local ngonflag=(numberofselectedngons.numberset>0)

	OverlappingVertices.check currentTime selectobj &arr_select_overlap_verts

	IsolatedVertices.check currentTime selectobj &arr_select_isolated_verts

	subObjectLevel=int_subobject_level

	if numberofselectedngons.numberset>0 or arr_select_overlap_verts.count>0 or arr_select_isolated_verts.count>0 then

	(

		appendIfUnique arr_failed_items selectobj.name as string

	)

	else

	(

		appendIfUnique arr_succeeded_items selectobj.name as string

	)

	--format "% has % ngons!\n" selectobj.name NGonCounter

)

	--OverlappingVertices.check currentTime selectobj &OverlapVerticesArray

	--IsolatedVertices.check currentTime selectobj &IsolatedVerticesArray

	--OverlapVertCounter=OverlapVerticesArray.count

	--IsolatedVertCounter=IsolatedVerticesArray.count


rollout checker_roll "Mesh Checker Tool" width:438 height:446

(

	button 'btn_refresh_sel' "Refresh Selected" pos:[79,51] width:251 height:25 align:#left

	listBox 'lbx_failed_check' "Meshes that Failed Check" pos:[7,87] width:205 height:13 align:#left

	listBox 'lbx_succeeded_check' "Meshes that Succeeded Check" pos:[216,87] width:205 height:13 align:#left

	label 'lbl1' "Select all meshes in scene to analyse then press button below" pos:[63,32] width:416 height:18 align:#left

	label 'lbl3' "Click on a mesh from the failed column and press button below to analyse" pos:[47,284] width:416 height:18 align:#left

	button 'btn_analyse_failed' "Analyse Chosen Failed Mesh" pos:[79,303] width:251 height:25 align:#left

	label 'lbl4' "Mesh Name:" pos:[7,345] width:63 height:20 align:#left

	label 'lbl5' "Triangle Count:" pos:[7,366] width:82 height:20 align:#left

	label 'lbl6' "Vertex Count:" pos:[7,388] width:75 height:20 align:#left

	label 'lbl_mesh_name' "Empty" pos:[73,345] width:106 height:20 align:#left

	label 'lbl_triangle_count' "0" pos:[88,365] width:82 height:20 align:#left

	label 'lbl_vertex_count' "0" pos:[88,388] width:75 height:20 align:#left

	label 'lbl12' "NGONs:" pos:[211,345] width:44 height:20 align:#left

	label 'lbl13' "Overlapping Vertices:" pos:[211,366] width:107 height:20 align:#left

	label 'lbl14' "Floating Vertices:" pos:[211,388] width:75 height:20 align:#left

	label 'lbl_ngon_count' "0" pos:[259,345] width:82 height:20 align:#left

	label 'lbl_floating_vertices' "0" pos:[294,388] width:75 height:20 align:#left

	label 'lbl_overlapping_vertices' "0" pos:[320,366] width:75 height:20 align:#left

	hyperlink 'hyp_documentation' "Questions? Click here for my documentation" address:"https://www.jolchawa.site/mesh-checker-maxscript" pos:[7,9] --width:416 --height:18 align:#left

	button 'btn_select_NGONS' iconName:@"StateSets\Visible" iconSize:[20,20] pos:[185,341] width:20 height:20 align:#left

	button 'btn_select_overlap_vert' iconName:@"StateSets\Visible" iconSize:[20,20] pos:[185,361] width:20 height:20 align:#left

	button 'btn_select_floating_verts' iconName:@"StateSets\Visible" iconSize:[20,20] pos:[185,382] width:20 height:20 align:#left

	button 'btn_deselect' "Deselect" pos:[265,408] width:166 height:26 align:#left


	on btn_refresh_sel pressed do

	(

		arr_failed_items=#()

		arr_succeeded_items=#()

		local arr_selection = selection as array

		local int_counter_of_items=0

		for obj in arr_selection do

		(	select obj

			--format "made it here"

			if classof obj == Editable_Poly then

			(

				int_counter_of_items +=1

				--format"regular\n"

				--format "found % of geometry in selection\n" int_counter_of_items

				NGONFinder(obj)

			)

			else

			(

				local str_name_conv_question = obj.name as string +" is not a Editable Poly, convert?"

				try

				(

					if queryBox str_name_conv_question title:"Warning!" beep:true icon:#warning then

					(

						convertTo obj Editable_Poly

						NGONFinder(obj)

					)

				)

				catch

				(

					print"Something went wrong, couldnt convert..."

				)

			)


		--lbx_succeeded_check.items=str_selection_names

		)

	lbx_failed_check.items=arr_failed_items

	lbx_succeeded_check.items=arr_succeeded_items

	select arr_selection

	)

	on btn_analyse_failed pressed do

	(

		try

		(

				obj_selected=lbx_failed_check.selected

				if obj_selected!=undefined then

				(

					--print"yeah somethin here"

					local arr_old_selection=selection as array

					--select #(getNodeByName lbx_failed_check.selected)

					lbl_mesh_name.text = lbx_failed_check.selected

					select (getNodeByName lbx_failed_check.selected)

					local int_triangle_count=0

					max modify mode

					--print $.numFaces

					for i in 1 to $.numFaces do

						(

							local num_verts = (polyOp.getFaceVerts $ i)

							if  num_verts!=undefined then

							(

								num_verts = (polyOp.getFaceVerts $ i).count

								--print num_verts

								--print "starting count"

								if num_verts > 3 then int_triangle_count += num_verts-2

								else int_triangle_count += 1

							)

						)

					--print int_triangle_count

					lbl_triangle_count.text=int_triangle_count as string

					lbl_vertex_count.text=polyop.getNumVerts $ as string

					--reuse function

					NGONFinder($)

					lbl_ngon_count.text=arr_select_ngons.numberset as string

					lbl_floating_vertices.text=arr_select_isolated_verts.count as string

					lbl_overlapping_vertices.text=arr_select_overlap_verts.count as string

					select arr_old_selection

				)


				else

				(

					lbl_mesh_name.text="Empty"

					lbl_triangle_count.text="0"

					lbl_vertex_count.text="0"

					lbl_ngon_count.text="0"

					lbl_floating_vertices.text="0"

					bl_overlapping_vertices.text="0"

					messageBox "Failed list is empty or missing object, unable to analyse" title:"Warning" beep:true

				)

		)


		catch

		(

			messageBox "Unable to analyse mesh" title:"Caution"

		)

	)

	on btn_select_NGONS pressed do

	(

		try

		(

			obj_selected=lbx_failed_check.selected

			if obj_selected!=undefined then

			(

				select (getNodeByName lbx_failed_check.selected)

				subobjectLevel = 4

				$.EditablePoly.SetSelection #Face (arr_select_ngons as bitarray)

			)


		)

		catch

		(

			print "Failed to select NGONS"

		)

	)


	on btn_select_overlap_vert pressed do

	(

		try

		(

			obj_selected=lbx_failed_check.selected

			if obj_selected!=undefined then

			(

				select (getNodeByName lbx_failed_check.selected)

				subobjectLevel = 1

				$.EditablePoly.SetSelection #Vertex (arr_select_overlap_verts as bitarray)

			)


		)

		catch

		(

			print "Failed to select overlap vertices"

		)

	)


	on btn_select_floating_verts pressed do

	(

		try

		(

			obj_selected=lbx_failed_check.selected

			if obj_selected!=undefined then

			(

				select (getNodeByName lbx_failed_check.selected)

				subobjectLevel = 1

				$.EditablePoly.SetSelection #Vertex (arr_select_isolated_verts as bitarray)

			)

		)

		catch

		(

			print "Failed to select floating vertices"

		)

	)

	on btn_deselect pressed do

	(

		try

		(

			deselect $

		)

		catch

		(

			print"Unable to deselect"

		)

	)

)

createDialog checker_roll
Presentation Shots and Documentation


For my documentation I kept it simple for my timeframe and made it a user guide, there is definitely room for expansion on the script end however I do not have time to break that down.
Download the documentation solo or bundled with my script below!
Sign Off:
Overall a great quick projec to jump back into Maxscripting, a great series I have slowly been working through is John Wainwright's "Maxscript 101" (Wainwright, 2011) tutorials. He created Maxscript and whilst a bit dated in some aspects it is still a treasure trove of useful information on writing in the language. I can't wait to make more tools in the upcoming weeks.
Bibliography:
3DSMAX, A. (2025). Listbox Documentation 3DSMAX. [online] Autodesk.com. Available at: https://help.autodesk.com/view/MAXDEV/2024/ENU/?guid=GUID-7C37748B-C682-4834-B5A6-74185C8C661A [Accessed 2 May 2025].
3DSMax, A. (2025). Hyperlink Documentation. [online] Autodesk.com. Available at: https://help.autodesk.com/view/MAXDEV/2023/ENU/?guid=GUID-1586F216-378F-4772-931A-F224709189C5 [Accessed 4 May 2025].
3DSMax, A. (2025a). Icons List. [online] Autodesk.com. Available at: https://help.autodesk.com/view/3DSMAX/2020/ENU/?guid=__developer_icon_guide_icon_resource_guide_html [Accessed 4 May 2025].
3DSMax, A. (2025c). Message Box Documentation. [online] Autodesk.com. Available at: https://help.autodesk.com/view/MAXDEV/2022/ENU/?guid=GUID-7A4AA91A-0DEB-470B-AD6B-2E7A3A105BD0 [Accessed 4 May 2025].
Wainwright, J. (2011). MAXScript 101 on Vimeo. [online] Vimeo.com. Available at: https://vimeo.com/showcase/1514565 [Accessed 4 May 2025].
These last two links I ended up not using yet, saving for future tool.
3DSMax, A. (2025d). Picking Scene Nodes by Name. [online] Autodesk.com. Available at: https://help.autodesk.com/view/MAXDEV/2024/ENU/?guid=GUID-9D407E2A-3691-426F-9B06-4A744C3DEE58 [Accessed 4 May 2025].
3DSMax, A. (2025e). Progress Bars. [online] Autodesk.com. Available at: https://help.autodesk.com/view/MAXDEV/2024/ENU/?guid=GUID-5C069EAA-E2EB-4F7B-B6AC-DECD51121348 [Accessed 4 May 2025].
Week 2 - Pivot Setter Tool

What is it and why?
One common issue I run into when modelling, especially that of modular pieces is setting correct pivots. Some engines handle this nicer than others (looking at you Unity) but it has always been a pain to snap meshe to one point or correct them in bulk. This tool will help resolve this issue.
Exploring Collapsable Menus:
As I was concepting a new UI, as a previous older tool I have made is able to handle this pivot problem somewhat I wanted to experiment with modifying rollouts at runtime.

The test came out quite succesful in theory however the execution is much messier. I would have to set every single button value to 0 and back again on button presses. I figured a array looping through buttons might work however it still felt quite clunky and would mean elements would have to overlap eachother, causing potential bugs.
Collapsable Menu Script Test
rollout unnamedRollout "Untitled" width:338 height:300

(

	global counter= true

	dropDownList 'ddl1' "List of Changes" pos:[8,56] width:94 height:40 align:#left

	label 'lbl1' "This is a test to see if I can control data below" pos:[48,8] width:224 height:24 align:#left

	button 'btn1' "I am button one I am always here" pos:[8,128] width:128 height:48 align:#left

	button 'btn2' "I am button 2 I will vanish" pos:[8,192] width:128 height:40 align:#left

	groupbox gb_general "General" pos:[460,89] height:102 width:380

	on btn1 pressed do

	(

		if counter!=true then

		(

			btn2.height = 40

			btn2.width = 128

			counter=true

		)

		else if counter=true then

		(

			btn2.width = 0

			btn2.height = 0

			counter=false

		)

	)

)


createDialog unnamedRollout
I ended up not going through with this as further issues popped up when trying to access data on spinners. I could not modify the scale so this would be a very finicky script for a more buttoney rollout.
Reworking UI:
I designed Patchwork about a year back and as my first big script it came as a answer to all my problems. However it too provided its own issues: it always needed to restart on runtime due to its thumbnail script and would frequently breakdown if button inputs led nowehere. I have since then learnt a better way to error handle using try () and catch (). I then simplified everything down to a more focused layout.

I then hopped into the visual maxscript rollout editor and was able to create the below copy to match quite easily. My only caveat is the thumbnail as I will need to redo some script to support the larger size + additional dropdown selection.

Proper Error Handling - Fixing Thumbnail Bug:
As you can see below, the script would run smoothly until being used to set the pivot on selection. Then it would break as it would not be able to find selection "min". However on a redrag, the script would function so it must be a bug with the rollout.

My solution was to force the rollout to try twice and fail silently. It now works without issue!

Redoing Math Vertex Array: You may notice that the UI between the two has drastically changed in way of dropdowns. I have split the functions into three drop down boxes than 2. This has however broken the script as my vertex thumbnail and setter selection arrays as the script is lost as to what index to look at.

I ended up remaking the selection based on some simple math. For example, if I wanted to select the front middle corner on the left I would get 25. However the middle value is 26 (+1). By writing if statements to +1 onto my index array if the selection numbers are 2 for middle I can select the correct vertex.

This behaviour works well until you get a result of a fully centred selection. As no vertices exist in the middle of a mesh, the easiest way to signify this is through selecting the entire ring of vertices. For this I have a seperate array, middle vert list.

I then updated my button set array, this is a simpler form of getting object bounds via .min, .max or .centre followed by XYZ. However it returns the same logic of if selection is middle, do the operation +3 (in the array). At first this did trip me up quite a bit as I am not used to indexs starting at 1 but rather 0 so I was getting values too early.

Overral, the script works well through first running through a thumbnail function and painting vertex colors of selected array. Updating thumbnail through this array on dropdown, and setting a custom execute command on button press. All other functions for transferring pivots (get pivot from A, then set on B) and location setting (put XYZ sliders into vector then set using vector) could be combined in the future below their buttons as they are not called elsewhere.
and here is the script!
Pivot Setter Final Script
global numbvertpaint=1

global arr_deletebox=#()

global CustomPivotXYZStore=[0,0,0]

rollout rollout_Pivot_Setter "Pivot Setter Tool" width:464 height:456

(

	label 'lbl2' "Set the pivot using height, direction and corner of selected mesh. You can set multiple pivots at the same time." pos:[17,44] width:327 height:32 align:#left

	groupBox 'grp1' "Bounds Pivot Setter" pos:[8,24] width:448 height:280 align:#left

	dropDownList 'dd_preview_height' "Height" items:#("Top","Middle","Bottom") pos:[15,80] width:209 height:40 align:#left

	dropDownList 'dd_preview_direction' "Direction" pos:[16,136] items:#("Front","Centre","Back") width:208 height:40 align:#left

	dropDownList 'dd_preview_corner' "Side" items:#("Left","Middle","Right") pos:[16,192] width:208 height:40 align:#left

	bitmap 'bmp_preview_thumbnail' "Bitmap" pos:[248,88] width:176 height:160 align:#left

	label 'lbl222' "Thumbnail failed to load! Tool is still functional..." pos:[300,120] width:100 height:75 align:#left

	label 'lbl4' "Preview Window" pos:[295,71] width:88 height:16 align:#left

	label 'lbl5' "Pivot Location = RED Dots" pos:[256,267] width:192 height:16 align:#left

	label 'lbl6' "Mesh Bounds = BLUE Wireframe" pos:[256,283] width:192 height:16 align:#left

	button 'btn_preview_button_settter' "Set Pivot to Preview" pos:[16,248] width:208 height:40 align:#left

	groupBox 'grp3' "Copy Pivot from Existing Mesh" pos:[8,312] width:224 height:112 align:#left

	hyperlink 'lbl_documentation_button' "For usage guide, click here for my documentation." address:"https://www.jolchawa.site/pivot-setter-maxscript" pos:[208,5] width:256 height:16 align:#left

	pickbutton 'btn_pick_mesh_a' "Pick A" pos:[16,360] width:80 height:16 align:#left

	pickbutton 'btn_pick_mesh_b' "Pick B" pos:[128,360] width:80 height:16 align:#left

	button 'btn_copy_mesh_pivot_setter' "Copy Pivot from Mesh A to B" pos:[32,383] width:160 height:32 align:#left

	groupBox 'grp4' "Set Pivot to Location" pos:[240,312] width:216 height:112 align:#left

	spinner 'spn_pivot_loc_x' "X:" pos:[248,360] width:46 height:16 align:#left range:[-1000,1000,0]

	spinner 'spn_pivot_loc_y' "Y:" pos:[316,360] width:46 height:16 range:[-1000,1000,0] align:#left

	spinner 'spn_pivot_loc_z' "Z:" pos:[389,360] width:46 height:16 range:[-1000,1000,0] align:#left

	button 'btn_pivot_location_setter' "Set Pivot to Location" pos:[272,384] width:160 height:32 align:#left

	label 'lbl8' "Transfer the same pivot across other meshes." pos:[16,332] width:200 height:16 align:#left

	label 'lbl9' "Set pivot using location in scene e.g. 0" pos:[250,332] width:200 height:16 align:#left

	label 'lbl11' "Changes from left update preview." pos:[256,252] width:192 height:16 align:#left


--this is to make thumbnail

	fn NumberforVert =

		(

			vertplist= #(7,4,1,8,5,2,9,6,3)

			vertmiddlelist=#(25,26,19,24,0,20,23,22,21)

			numbvertpaint=0

			int_direction_self=dd_preview_direction.selection

			cpivotsel=dd_preview_corner.selection


			if dd_preview_height.selection==3 do

			(

				if int_direction_self==1 then

				(

					numbvertpaint=vertplist[cpivotsel]

				)


				if int_direction_self==2 then

				(

					numbvertpaint=vertplist[cpivotsel]+1

				)


				if int_direction_self==3 then

				(

					numbvertpaint=vertplist[cpivotsel]+2

				)

			)

			if dd_preview_height.selection==2 do

			(

				if int_direction_self==1 then

				(

					numbvertpaint=vertmiddlelist[cpivotsel]

				)

				if int_direction_self==2 then

				(

					if cpivotsel==2 then

					(

						numbvertpaint=0

					)

					if cpivotsel==3 then

					(

						numbvertpaint=vertmiddlelist[cpivotsel]+1

					)

					if cpivotsel==1 then

					(

						numbvertpaint=vertmiddlelist[cpivotsel]-1

					)

				)

				if int_direction_self==3 then

				(

					if cpivotsel==1 or cpivotsel==3 then

					(

						numbvertpaint=vertmiddlelist[cpivotsel]-2

					)

					if cpivotsel==2 then

					(

						numbvertpaint=vertmiddlelist[cpivotsel]-4

					)

				)


			)

			if dd_preview_height.selection==1 do

			(

				if int_direction_self==1 then

				(

					numbvertpaint=vertplist[cpivotsel]+9

				)

				if int_direction_self==2 then

				(

					numbvertpaint=vertplist[cpivotsel]+10

				)

				if int_direction_self==3 then

				(

					numbvertpaint=vertplist[cpivotsel]+11

				)

			)

		)


	fn RefreshBox =

	   (

		   if selection.count!=0 then

			(

				oldselection=getCurrentSelection()

			)

		   --creates text that shows front, back, left and right

		   --front text

		   fronttext=TextPlus layouttype:1 Plane:0 width:60 length:60 pos:[52,-11,-16.846] isSelected:off

		   fronttext.SetPlaintextString "Front"

		   convertTo fronttext PolyMeshObject

		   rotate fronttext (angleaxis -50 [0,0,1])

		   rotate fronttext (angleaxis -20 [0,1,0])

		   scale fronttext [0.3,0.3,0.3]

		   shellmod=Shell()

		   shellmod.outerAmount=0.2


			addModifier fronttext shellmod


			--back text

		   backtext=TextPlus layouttype:1 Plane:0 width:60 length:60 pos:[210,30,-16.846] isSelected:off

		   backtext.SetPlaintextString "Back"

		   convertTo backtext PolyMeshObject

		   rotate backtext (angleaxis -50 [0,0,1])

		   rotate backtext (angleaxis -20 [0,1,0])

		   scale backtext [0.9,0.9,0.9]

			addModifier backtext shellmod


		   --left text

		   lefttext=TextPlus layouttype:1 Plane:0 width:60 length:60 pos:[58,13,-16.846] isSelected:off

		   lefttext.SetPlaintextString "Left"

		   convertTo lefttext PolyMeshObject

		   rotate lefttext (angleaxis -50 [0,0,1])

		   rotate lefttext (angleaxis -20 [0,1,0])

		   scale lefttext [0.3,0.3,0.3]

		   addModifier lefttext shellmod


		   --right text

		   righttext=TextPlus layouttype:1 Plane:0 width:60 length:60 pos:[180,-45,-16.846] isSelected:off

		   righttext.SetPlaintextString "Right"

		   convertTo righttext PolyMeshObject

		   rotate righttext (angleaxis -50 [0,0,1])

		   rotate righttext (angleaxis -20 [0,1,0])

		   scale righttext [0.8,0.8,0.8]

		   addModifier righttext shellmod


		   textmaterial=standardMaterial name:"White" diffuse:(color 255 255 255)

		   fronttext.material = textmaterial

		   backtext.material = textmaterial

		   lefttext.material = textmaterial

		   righttext.material = textmaterial


				---creates box and rotates it

			obj=Box pos:[96.551,0,-15.846] isSelected:on width:30 length:30 height:30

			rotate obj (angleaxis 39 [0,0,1])

			rotate obj (angleaxis -20 [0,1,0])

			obj.lengthsegs = 2

			obj.widthsegs = 2

			obj.heightsegs = 2

			--select obj

			convertTo obj PolyMeshObject

			allverts=polyop.getNumVerts obj

			--print allverts


			append arr_deletebox obj

			append arr_deletebox righttext

			append arr_deletebox lefttext

			append arr_deletebox backtext

			append arr_deletebox fronttext


			--- adds vertex paint to box as needede

			paintmod=PaintLayerMod()

			addModifier obj paintmod

			getstate=paintmod.AcquirePaintState obj


			--print"selected verts"

			--THIS IS THE VERT SELECTION

			--sets entire colour

			--print getstate as string

			if getstate==undefined then

			(

				select obj

				--print"im at get state undefined"

				getstate=paintmod.AcquirePaintState obj

			)

			--print getstate as string

			for i=1 to allverts do

			(

				--vertnabbing=GetRawIndex()

				getstate.SetVertColor i [0.1, 0.1, 1, 1]

			)

			--getstate.SetVertColor 3 [1, 0, 0, 1]

			paintmod.ApplyPaintState obj getstate


			--select verts here

			NumberforVert()

			if numbvertpaint==0 then

			(

				for i=19 to 26 do

				(

					getstate.SetVertColor i [1, 0, 0, 1]

					--print"got state"

				)

			)

			else

			(

				--print"set state else"

				getstate.SetVertColor numbvertpaint [1, 0, 0, 1]

			)

			--print "obj now"

			paintmod.ApplyPaintState obj getstate

			--print"obj dones"


			--print"added state"

			--add material that picks up on vertex colours

			VertexMaterial = standardMaterial name:"VertMat" diffusemap:(vertexColor())

			obj.material=VertexMaterial


			--adds camera to view

			CameraforRender=Freecamera fov:45 targetDistance:160 nearclip:1 farclip:1000 nearrange:0 farrange:1000 mpassEnabled:off mpassRenderPerPass:off transform:(matrix3 [0,-1,0] [0,0,1] [-1,0,0] [0,0,-5]) isSelected:off

		   renderers.current=Default_Scanline_Renderer()

			select obj

			selectMore fronttext

			selectMore backtext

			selectMore lefttext

			selectMore righttext


		--print"not rendered yet"

			--renders selected obj in viewport


		   theBmp=render camera:CameraforRender shadows:false renderType:#selection force2sided:true forceWireframe:true wireThickness:2 outputsize:[220,200] vfb:off

			bmp_preview_thumbnail.bitmap=theBmp

				--bmp_preview_thumbnail.images = #(theBmp, undefined, 1,1,1,1,1 )


		   renderers.current=Arnold()

			append arr_deletebox CameraforRender

			print "rendered!!"

			--removes object and camera

			--int_counter_array=0


			---cleaner function before

			for x in arr_deletebox do

			(

				try

				(

					delete x

					local intno=findItem arr_deletebox x

					deleteItem arr_deletebox x

				)

				catch

				(

					print"couldt delete for soem reason"

				)


				--delete x

				--deleteItem arr_deletebox x

				--int_counter_array+=1

			)


			arr_deletebox=#()


			if oldselection!=undefined then

			(

				select oldselection

			)

			-------

			---------------

			--------

	    )


	fn ApplyingPivotfromPreview newObj =

		(

			Zpivot=#("newObj.max.z","newObj.center.z","newObj.min.z")

			--print Zpivot[1]

			CPointsY=#("newObj.min.y","newObj.min.y","newObj.min.y","newObj.center.y","newObj.center.y","newObj.center.y","newObj.max.y","newObj.max.y","newObj.max.y")

			CPointsX=#("newObj.min.x","newObj.center.x","newObj.max.x","newObj.min.x","newObj.center.x","newObj.max.x","newObj.min.x","newObj.center.x","newObj.max.x")

			if newObj!=undefined then

			(

				if dd_preview_direction.selection==1 then

				(

					makecommand="newObj.pivot=["+CPointsX[dd_preview_corner.selection] as string+","+CPointsY[dd_preview_direction.selection]as string +","+Zpivot[dd_preview_height.selection]as string+"]"


				)

				if dd_preview_direction.selection==2 then

				(

					float_set_value_x=dd_preview_corner.selection +3

					float_set_value_y=dd_preview_direction.selection+3

					makecommand="newObj.pivot=["+CPointsX[float_set_value_x] as string+","+CPointsY[float_set_value_y] as string +","+Zpivot[dd_preview_height.selection]as string+"]"

				)

				if dd_preview_direction.selection==3 then

				(

					float_set_value_x=dd_preview_corner.selection+6

					--messageBox float_set_value_x as string

					float_set_value_y=dd_preview_direction.selection +6

					makecommand="newObj.pivot=["+CPointsX[float_set_value_x] as string+","+CPointsY[float_set_value_y] as string +","+Zpivot[dd_preview_height.selection]as string+"]"

				)

				print"skipped or completed?"

				execute makecommand

			)

		)


	-------------------------

	on btn_pick_mesh_a picked x do

	(

		try

		(

			btn_pick_mesh_a.text=x.name

		)

		catch

		(

			print "cannot set picked mesh"

		)

	)


	on btn_pick_mesh_a rightclick do

	(

		btn_pick_mesh_a.text="Reset!"

	)


	on btn_pick_mesh_b picked x do

	(

		try

		(

			btn_pick_mesh_b.text=x.name

		)

		catch

		(

			print "cannot set picked mesh"

		)

	)


	on btn_pick_mesh_b rightclick do

	(

		btn_pick_mesh_b.text="Reset!"

	)


	on btn_copy_mesh_pivot_setter pressed do

	(

		try

		(

			if btn_pick_mesh_a.object ==undefined or btn_pick_mesh_b.object==undefined then

			(

				messagebox "Meshes are not picked!" beep:false

			)

			else

			(

				btn_pick_mesh_b.object.pivot=btn_pick_mesh_a.object.pivot

			)

		)

		catch

		(

			print"Could not copy mesh over!"

		)

	)


	-----------

	-------------------

	on spn_pivot_loc_x changed theVal do

	(

		CustomPivotXYZStore[1]=theVal

		--print CustomPivotXYZStore as string

	)

	on spn_pivot_loc_y changed theVal do

	(

		CustomPivotXYZStore[2]=theVal

		--print CustomPivotXYZStore as string

	)

	on spn_pivot_loc_z changed theVal do

	(

		CustomPivotXYZStore[3]=theVal

		--print CustomPivotXYZStore as string

	)

	on btn_pivot_location_setter pressed do

	(

		try

		(

			for obj in getCurrentSelection() do

			(

				obj.pivot=[CustomPivotXYZStore[1],CustomPivotXYZStore[2],CustomPivotXYZStore[3]]

			)

		)

		catch

		(

			print"Failed to set mesh pivots to location inputted"

		)


	)


	----------


	on rollout_Pivot_Setter open do

			(

				arr_old_selection=selection as array

				try

				(

					RefreshBox()

					select arr_old_selection


				)

				catch

				(

					select arr_old_selection

					try

					(

						print arr_deletebox as string

						--local another=0

						for x in arr_deletebox do

						(

							delete x

							deleteItem arr_deletebox int_counter_array

							--int_counter_array+=1

						)

						select arr_old_selection

					)

					catch

					(

						print "failed to delete meshes"

					)

				)

			)


	on btn_preview_button_settter pressed do

	(

		getcurrentSelection()

		try

		(

			if selection.count!=0 then

			(

				for obj in getCurrentSelection() do

				(

					newObj=obj

					ApplyingPivotfromPreview obj

				)

			)

			else

			(

				messagebox "Nothing is selected!"

				print"Nothing selected"

			)

		)

		catch

		(

			print"Failed to select assets trying again"

			try

			(

				if selection.count!=0 then

				(

					for obj in getCurrentSelection() do

					(

						newObj=obj

						ApplyingPivotfromPreview obj

					)

				)

				else

				(

					print"Nothing selected"

				)

			)

			catch

			(

				print"Failed retry selection"

			)

		)

	)


	on dd_preview_height selected i do

	(

		RefreshBox()

	)


	on dd_preview_corner selected i do

	(

		RefreshBox()

	)

	on dd_preview_direction selected i do

	(

		RefreshBox()

	)

)


CreateDialog rollout_Pivot_SetterPresentation Shots and Documentation
A quick overview of what this little snippy script can do.

One large aspect I wanted to improve on was error handling, and the scripts largest possible point of failure is the thumbnail preview. Due to this I have added a label that sits below, and should the bitmap fail to render it will shine through. As the script uses try () it will continue working even if this thumbnail doesn't show.


I even had enough time to write some quick start documentation, read it here!
Download the documentation here!
Download the tool + documentation (.zip) below:
Sign Off:
I had quite some fun improving on my previous script and fixing bugs to finally put it into a reliable state. One caveat with the time was I did not have enough time to fully review my parameters and change their names to my ongoing structure of int_var or string_var arr_var etc as it would mean manually replacing it in tons of areas. This did make it difficult to adjust the vertex setter however it stands as a strong lesson to always name parameters right from the start! It will become a headache later. If I was to change the script in any way I would tackle trying to unify all buttons to one master pivot set button that could have toggles with what mode is being used to set. As at the moment theres a lot of buttons that do the same thing - execution of functions. Furthermore the transfer from Mesh A to B could be improved by saving Mesh A pivot and transferring to all selected by way of a for obj in selection type of code, looping until all meshes have that pivot.
Week 3 - Mesh Aligner Tool

What is it and why?
For this weeks tool I wanted to resolve the largest problem when working on 3D meshes and needing checking them in engine/aligning a asset zoo nearing the end of a project; the positions of meshes in scene. It can get quite overwhelming when working with a large scene file full of different meshes, so this tool should be able to save a position, let the user align them in a row or zero all positions for engine exporting. Then reload the old transform using the saved data.
Creating and Searching in Transform Arrays
To begin I made a few simple buttons which would trigger when pressed. I then wrote some maxscript to gather the selected names of meshes and place them into a array called arr_items_selected_name and their transforms which will be added to array arr_items_pivots. Another button called reset would then call for the same item in selection and place the transform back to where it was.

This is where I encountered my first hurdle. What if the user did not select all the meshes they inititially selected or decided to not move one out of the saved list back. I had to account for this on my reset button so I came up with some if statements to look through the names in the saved array. If it found a match (above 0) it would find and place that mesh back to where it needs to be. This worked quite well as it eliminated needing to keep the values the same.

Script Progress
rollout Asset_Zoo_Positioner "Asset Zoo Positioner" width:471 height:489

(

	global arr_items_selected_name=#()

	global arr_items_pivots=#()


	button 'btn_move_asset_zoo' "Order to Asset Zoo" pos:[35,129] width:189 height:61 align:#left

	button 'btn_reset_saved_pos' "Reset Position" pos:[246,130] width:189 height:61 align:#left

	button 'btn_save_position' "Save Position" pos:[136,46] width:189 height:61 align:#left

	spinner 'spn_space_x' "Spacing X" pos:[39,227] width:43 height:16 range:[0,100,20] align:#left

	spinner 'spn_space_Y' "Spacing Y" pos:[151,226] width:43 height:16 range:[0,100,0] align:#left

	spinner 'spn_space_z' "Spacing Z" pos:[264,229] width:43 height:16 range:[0,100,0] align:#left


	on btn_save_position pressed do

	(

		try

		(

			sel_getting=getCurrentSelection()

			if arr_items_selected_name.count>0 then

				(

					arr_items_selected_name=#()

					arr_items_pivots=#()


				)

			if sel_getting.count==0 then

				(

					messagebox "Nothing is selected!"

				)

			for obj in sel_getting do

			(

					string_name=obj.name as string

					float_pivot_mesh=obj.pos

					append arr_items_selected_name string_name

					append arr_items_pivots float_pivot_mesh

			)

			--print arr_items_pivots as string

		)


		catch

		(

			print "Could not save position"

		)

	)

	on btn_reset_saved_pos pressed do

	(

		try

		(

			arr_selection=getCurrentSelection()

			for i=1 to arr_selection.count do

			(

				finding_item=findItem arr_items_selected_name arr_selection[i].name

				try

				(

					if finding_item!=0 then

					(

						obj=getNodeByName arr_items_selected_name[finding_item]

						obj.pos=arr_items_pivots[finding_item]

					)

					else

					(

						print "cant set it!"

					)

				)

				catch

				(

					print"Could not set location for" +arr_items_selected_name[i] as string

				)

			)

		)


		catch

		(

			print"Failed to set location to last, missing?"

		)

	)

	on btn_move_asset_zoo pressed do

	(

		try

		(

			current_sel=getCurrentSelection()

			float_move_x=0

			float_move_y=0

			float_move_z=0


			for i=1 to current_sel.count do

			(

				current_sel[i].pos=[float_move_x,float_move_y,float_move_z]

				float_toadd_x=current_sel[i].max.x-current_sel[i].min.x

				float_move_x+=float_toadd_x+spn_space_x.value


				--float_toadd_y=current_sel[i].max.y-current_sel[i].min.y

				float_move_y+=spn_space_y.value


				--float_toadd_z=current_sel[i].max.z-current_sel[i].min.z

				float_move_z+=spn_space_z.value

			)

		)


		catch

		(

			print "Couldnt move to asset zoo"

		)

	)

)

CreateDialog Asset_Zoo_Positioner
However I still had the issue of what if I wanted to get rid of one saved position but keep others. I knew I would have to make a more complex UI to handle these problems and be a lot more easier to understand next.
Making a Better UI

In comparison to my other tools this one had to be done in a series of specific steps which is why I designed my UI in sections. By dividing compartments down users could save, then see all saved positions and in the final bottom area act on these arrays.

I jumped into the UI maxscript maker and was able to create the result quite well including the obligatory documentation hyperlink! Now time to make these new bits actually function.
Making List Items Appear and Disappear

To add the text to the list I just defined the items to be the array, as its all string data at the end of the day. However for my functionality of getting rid of saved data that would be unwanted without a full reselect + save button I would need to use the listboxes doubleClick event.

This would register and print out the item selected. From here I searched for it in the array and if it found a match (it should!) the mesh would be deleted from both name and position arrays. This made the tool a lot more useful.

Checkboxes and Zeroing Position
My script from when I was testing the alignment bounds using just one button click took into account how wide objects were. It then added it to the inputted number for distance, default 20 however this could cause potential issues for aligning meshes vertically/depth wise.

This is what the checkboxes are for and by passing through a few if checks they are able to add or remove the bounds calculation should the meshes be snapped all to the same 0 axis or adjusted. Furthermore the button for zeroing selection was the easiest to script up as all I needed to do is run through selected objects and assign their positions to 0.

Updating Date and Time

As I was growing more confused with when was the last time I pressed the save button, the date and time timestamp can help give more insight. For this I called for the users localTime and was able to grab the date and hour minutes from the provided array. I used try as per usual to ensure that failure provided a silent error message but otherwise should update the labels.text. On a failed select the numbers return to 00:00 as to not give false positives of saving meshes to the list.
Presentation Shots and Documentation
Heres the final result working!
And some presentation images of functions + documentation cover.


Download the documentation here!
Download the tool + documentation (.zip) below:
Sign Off:
Overall I'm quite happy with how snappy this script works and is able to solve a long time issue I've seen others plus personally experienced during 3D modelling. As I've been picking up more terminology I've found myself speeding through writing this script so I definitely want to tackle something more complicated next or obscure. If I was to improve this script I would tackle making the menu dropdowns or hide some elements, I have noticed a radio button in the user interface options? I will need to look into this more alongside if its possible to dock scripts as they can be a bit finicky to keep relaunching if they hide or accidentally get closed down by the user.
Bibliography:
3DSMAX, A. (2025b). Time in Maxscript. [online] Autodesk.com. Available at: https://help.autodesk.com/view/3DSMAX/2015/ENU/?guid=__files_GUID_8882888F_3AEF_477E_8CF1_6BD7338B9DB5_htm [Accessed 13 May 2025].
3DSMax, A. (2025a). Arrays in Maxscript. [online] Autodesk.com. Available at: https://help.autodesk.com/view/MAXDEV/2022/ENU/?guid=GUID-A5B54C67-BFDD-45C0-9D6B-E6869817282A [Accessed 13 May 2025].
Weeks 4/5 - Tree Generator
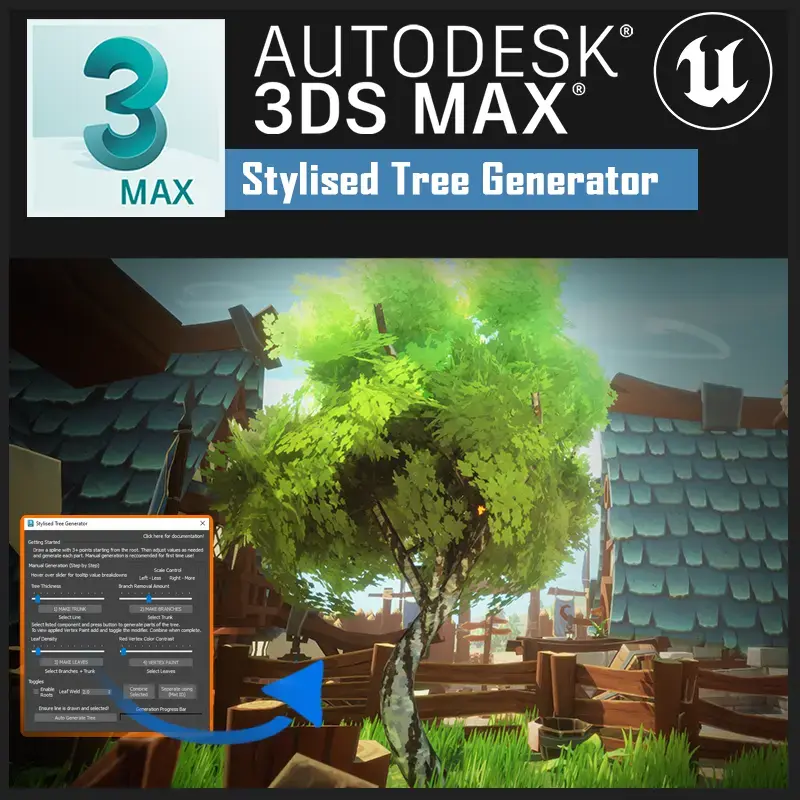
What is it and why?
I wanted to really push myself with my final tool of the month to use all my previous knowledge of pivots, mesh fixing and transforms to create new geometry. I settled on a tree generator after playing too much of Animal Crossing and coming to love their stylised foliage. I did want to attempt a bit more out of the box silhouette generations but still have the fun colourful shaders that make the world so charming, inspired concept a bit further down.
Research and Inspiration:

Before jumping into design, I conducted some research on how I should make my generator work in terms of steps. I knew that the trunk could be made from a spline, and the branches would be extruded/splines too, but I was quite stuck on how to make good, stylised leaves. I then found this brilliant set of “Stylized Tree Tutorials” by Viktoriia Zavhorodnia (Zavhorodnia, 2023). The method she utilised was setting up a few planes that are rotated around to form a mini triangle pyramid then rotated again as a group to make leaf balls. I knew this would be the direction I wanted to take and pick up some tips on how to build a shader later, so I went to work on building my tool.
Building Trunks:

To begin I made a simple rollout UI with buttons, sliders and an inspirational Bob Ross quote to keep me going. The buttons would take my selected curve and allow me to parse the spline points into my Maxscript. I also included a delete button for quick debug generating. I hit my first challenge almost immediately as I needed to settle on a method to generate the trunk either; grab the point data to generate a consistent spline with adjustable curve sliders or duplicate the spline data and convert to mesh. I first attempted to generate a more consistent spline which allowed a lot of freedom in adjusting a drawn-out spline graph that maybe the artist needed a more linear/straight results and would save on redrawing the spline. I also added a checker to ensure the height of the spline is always above a certain threshold to prevent it collapsing in on itself. This is also where I uncovered how important it is to set the correct #smooth #curve or harsher line modes for building splines from script.
However, this made it harder to get a fine-tuned result closer to the original as there were now more parameters for “wiggle” and added thickness to adjust once applying a Push modifier. I decided to use the best of both worlds and once the spline is duplicated, to parameters are set to a consistent 16 sides to make selection easier for my Push modifier. I needed to apply a gradient soft select from the bottom first 16 vertices which made setting the number consistency important for this stage. This way the push modifier is very gradient based and extends to the height of the selection making a thicker base closer to roots. I’m very grateful for 3DSMaxs listener mode as it made it quicker to make changes and translate them straight into Maxscript.
Making Branches
After seeing good results from my trunk, I hopped onto making branches. To detect where to spawn branches I would need to get the topmost faces which I did by comparing verts on the mesh position to half the height (max-min). I could then remove a couple of these branches at random to make the face selection from used branches a bit less predictable.

After getting the remaining verts and the faces they use into another array it was time to calculate the spawns of the branches. Initially I randomly applied a rotation and spawned a spline branch on the face position. This worked well to align the branch to the mesh.

But I had another issue of facing, some branches would clip through the trunk, face downwards or even intersect with another branch. The spawning wasn’t very realistic as branches need to grow outwards, so I did some more research into mesh normal.

Each face has a normal direction, if I could grab the up direction, cross normalise the other directions and grab that transform data onto the branch spawn I could force it to always face outwards no matter where it spawns (as long as the faces normal aren’t broken). (Courtsey to Garibazys script solution here: https://www.scriptspot.com/forums/3ds-max/general-scripting/how-to-get-a-vertex-s-normal-informations ) This worked like a charm! I added the random angle rotation back just to ensure there is a bit more randomness on top of the spawn. No two branches should spawn in the same way. I then added a large array of pre-defined splines that could be spawned to make these primary branches.

To create the thickness, I copied my push logic to select the beginning and apply the modifier like I did for the trunk to make more plausible branches.

All I had was some bugs regarding some branches being rotated too much (facing down), branches needing to be offset deeper into trunk, and a harsher culling needed to get rid of the large amount still spawning despite the vertex removal. But I’ll tackle this later I need to get more logic spawned in.
Spawning Twigs (REMOVED FUNCTION)
Initially I wanted to spawn some twigs to add onto the branches as some of my stylised tree references had them. To get this logic working I used the normal spawning logic but in terms of selecting faces that are facing either Left or Right. I got this working quite well, but I realised that the overall design of the tree was straying closer to realism. Additionally to generate enough twig points the branch mesh would need to be quite dense in faces.

The smaller twigs really broke the silhouette and made generation times really, REALLY long. I ended up cutting it but for test run I did spawn leaf planes onto these twigs, and the result was not filled in nor looked good so lesson learnt.

Here is the the piece of concept art by Silya (ArtSilya, 2023) I ended up adhering to as my master reference for how I want to generation to workout.

Spawning Spheres for Leaves
I began by creating the planes as showcased in Viktoriia Zavhorodnia (Zavhorodnia, 2023) video and pasting my instructions from the listener into Maxscript. I cleaned up the spawn location and size and got a pretty good result. I experimented with copying this pyramid leaf set around 45 degrees to make a ball and got a good result but encountered another problem. Trees typically don’t have leaves the entire way down across a sphere (unless it’s an Animal Crossing tree) so spawning will need to be more complex to compensate. I realised with my previous trunk to branch spawning I could spawn these on faces of a sphere and using the normal selection from below, cutoff the bottom faces of a sphere. I first planned how I would want to spawn these orbs.

The big green spheres are the large core spheres that would need to spawn within the bounds of the highest and lowest branches. Then on top smaller purple spheres can be applied to give it a bushier outcome. These are all parameters that I can then expose in Maxscript to give greater control over tree leaf thickness/density. I then went about scripting this behaviour and grabbing random vector position coords within the branches range to set a general zone.

I used the Boolean modifier to combine these to the base large spawning orb so that all those spawned after an be intersecting inside. Without Boolean lots of leaves will spawn inside each other and overall will add more cost to overdraw without any real benefits since the area will be dense with leaves anyway.

All was going great as I then used this very large mass of spheres to spawn the smaller purple orbs when I struck a large issue. Sometimes spawns will not be intersecting and will become floating.

This is a large issue as trees typically don’t have randomly ghostly bunches of leaves just floating. I realised that after booleaning I could use the element counter to try and remove these random balls. However, I encountered another issue, for some reason element 1 was only the original ball in selection and the other verts were counted as their original elements. After a few days of trying to figure out a solution I landed on doing a vertex weld of a large zone. This sphere will be deleted after it spawns leaves so it’s not an issue if there are large blaring welds. Any faces not attached to the first welded spawn sphere giant will be removed. This worked surprisingly well, minus the time is decided to keep everything and spawned the great orb of leaves.

Intersecting with Vol Select:
One great modifier I ended up using heavily to spawn and fix issues is Volume Select. This modifier lets you pick two objects and figure out if they are intersecting in space. At first for spawning leaves especially the smaller bits I wanted to find locations where branches are going through and prioritise those faces but the built in intersect scripts with bounding boxes picked too large of an area.

Branches are thing and fiddly so after messing around with volume select and transferring selected verts down editable poly it worked a charm. I ended up using this logic to fix my branches intersecting as they tended to spawn too close to each other. The first branch would take priority, and the second would be removed. Brilliant modifier definitely one of my favourites on top of Boolean.

Fixing Branch Issues:
My last remaining predominant branch issues are offsetting deeper into tree trunk, flipping those facing down and affecting height spawns. The first was quite easy to resolve by adding a few lines to the transform to move back a bit into the tree trunk. Sometimes clipping still occurs but it is less of an issue.Moving onto rotation, I used the end vert and first vert to compares height values. If the end is lower than the first it means the branch is facing downwards so it gets a full flip upwards. For height I added a modifier that multiplies the array depending on the height of the tree. If a tree is drawn smaller the branches become shorter. Or if the tree is quite tall the branches compensate. I can also expose this to make artists able to generate short stubbly trees or taller weeping willows.

UI Combine
Till this point all my scripts were running off a lot of buttons. This is not ideal visually as it becomes more and more confusing to figure out what does what. So, I drafted up a redesign with all my functions and opened the Visual Maxscript Editor to create a better rollout.

In this new design I wanted to focus on exposing parameters with clear explanations to what they do, though I may add this text to tooltips instead. Alongside a progress bar to help visualise how close the script is to completion as at some points especially leaf generation I cannot tell if 3DSMax is frozen or still working on something.

I had some hiccups about it running as parsing branches and selections across became nightmare in such long script, so I used a numbering system in my function callout. There are some bugs to fix but I believe its time to finally get it into engine after I apply vertex painting.
Normals, Vertex Painting and Mat IDS:
It’s time to finally apply final fixe so the leaves, set all material ids and apply. Its standard practice for better shading on planar objects to reset all normals to a centre pivot. I used to do this with Norms Normal script and a sphere (https://www.scriptspot.com/3ds-max/scripts/noors-normal-thief )however I found this method to work equally as well on Polycount (thread by HashBrownHamish,2017 ). Link: https://polycount.com/discussion/193855/working-normal-thief-for-3ds-max-2018
By getting the centre position of the final leaf mesh all normal scan be reset to face here. Additionally, by going through each face, vertex painting values can be applied towards RGB between 0-1 to give more masking options in engine. I want to make wind more broken up as all pieces of leaves don’t react at the same time to wind, they have a bit of weight so vertex painting would work best.

The video I also referenced for leaf creation also uses centred normals for the shader too as you can apply masking to all verts below a certain normal facing to help create gradients. Materials were simple, by defining a subject material and two callouts for leaf and branch I can set both meshes to these mat IDS and combine. It’s important to combine onto the trunk as the pivot comes from the base not the other way around.

Shaders and Setup in Unreal Engine:
I followed the super useful tutorial by Viktoriia Zavhorodnia but decided to expand on the leaf functions alongside build a custom bark shader to meet my needs. As I was following Sylas concept I knew I would need specific controls for bark tiling and my new vertex data found on the leaves. I could have applied extra vertex data to the trunk for some cool gradient effects such as snow or moss layering but decided to hold that off for another time. Here is the first tree that I setup with my shader initially.

To begin I added controls for the alphas, I had channel packed some drawn alphas but decided I wanted a more randomised layering result. Using the values between 0-1 I could pass an if statement to check the greyscale value and pick a random leaf shape from my channel pack. This added an immense amount of control for a more natural looking tree.

Furthermore, I added more gradients using world position, noises and vertex channels red and blue. Whilst initially just to add more colour breakdown these helped also in offsetting some leaves further inside the mesh, breaking up silhouette.
Checkout my full leaf shader graph: https://blueprintue.com/blueprint/xqx2249e/
Checkout my full bark shader graph: https://blueprintue.com/blueprint/takn423i/
After the world position offset worked well, I applied this logic to my tree, I can now control the thickness of the overall base with a world position to local gradient. I then ran into my largest issue, the non-existent UVS.

UV Hell and Roots
As the title implies, I had forgotten about UVS, as cylinder unwrapping is simple then you grab the modifier and set some seams. Theres a specific tool button in the modifier that can strip and peel it into a perfect flat unwrap. Sounds simple right? Well after countless hours and multiply days I could not for the life of me get this button to work or be pressed via Maxscript. It did not show up in listener, I could not call for it under the Modifier, I tried even using the UI max.ops override to get Max to press the button like a user would but still. NOTHING. I was super frustrated until I uncovered that there is 2 unwrap modifiers. (Theres a lot more actually but I will be ignoring them as they deserve to be).

So, I got the second one called UV Map and realised I could force a shape unwrap onto the branches so I chose a box and bingo UVS, looked great in 3DSMax the checker had some harsh lines, but I figured it wouldn’t be that large of an issue. I pasted this logic to my branches too, so they got unwrapped. Low and behold it looks awful in Unreal Engine.

The seams, goodness gracious the seams. At this point I realised that an artist would have just unwrapped it or taken it into another program, so I gave up and slapped a world aligned texture node instead into my bark logic. Not the most optimised but it is what it is. Further on I looked back at the concept and saw that there are roots. I thought about how to integrate this after all they had to naturally become part of the silhouette of the trunk. So, I decided to extrude the bottom face out in a list of instructions from Listener which worked well until… it didn’t. Turns out that not every spline is generated the same length wise for the first set of faces so, in one of my debugs runs I created this beautiful creature I dub the Dorito.

I gave up on this feature in the quest of time, it was already into June, so I wanted this tool complete. If an artist really needed roots, they could model it themselves.
Another UI Redesign
Yup, I did it again. I was not completely satisfied with the rollout as a lot of the parameters felt very cramped and out of the way of generating the mesh. During my testing I realised that I didn’t really like the automatic generation method, it was super great to see progress chug along and have it spit out the mesh but it left little adjustment along the way. I decided to redesign the order of the layout to simplify this completely and push the manual method as the best way to use the tool. It ended up working way better and the progress bar became a universal stable of generated progress. It was easy to call for so upon random bits in the script I would add a +5 or +1 to the bar (max value 100) setting it to 100 if it completed the function. This would then be reset to 0 at beginning of running a new portion. Worked way better and felt more uniform.

Final Script Code Here: https://pastecode.io/s/uede0jfa
Setting Up Renders and Leaf VFX:
As this tool needs to fit into a stylised environment I looked and stumbled onto a lovely modular stylised village called FANTASTIC - Village Pack (by Tidal Flask Studio). A brilliant colourful village, I did have to make my own post process volume but otherwise built a little shot location near a house. Using Niagara I created a falling petal that had the alpha of one of my leaves however when I was recording my video sequences, I realised the different colour of the leaves meant the particle needed to have a different colour too.
This became surprisingly difficult to do by calling for the emitter on my level sequencer, so I called for the material instance and exposed the colour parameter. Once again it did not work, I don’t know why so I decided to try another way by forcing the parameter to be part of a material parameter collection.

This finally worked! Bit overkill but I needed the renders perfect. I setup my material instances for maple tree, birch and Sakura and rendered out my sequences. Whilst I waited for the video to be outputted, I jumped onto my documentation.
Documentation:
By this point I had grown quite confident in writing documentation but realised this will have to be a comprehensive one yet. I wrote a lot of cautions and warnings regarding performance as the tool when generating leaves tends to take up a LOT of processing power if the density is set to high. Additionally, there is a comprehensive bug fixing section to hopefully eliminate any odd behaviours. I’ve done around 20 generations back-to-back manually to try and iron out issues.
Download my documentation below and my tool:
Final Project Renders:
Here are renders and videos of my final script alongside how my trees look like in Unreal Engine.


Maxscript May Reflection:

To conclude I wanted to look over everything I managed to make and make some plans for what I want tackle next. What went well during Maxscript May was that I tackled a ton of tools I genuinely always wanted and frequently use. I have shared them to my students which has proven useful and as I was working on my tree generator, I used my location and pivot tools to set up my meshes correctly for exporting. Theres a ton of topics I feel more confident in when it comes to manipulating transform data and normals for meshes. I even delved into some shaders that will become a large diving point for more shader-based projects as there is very little of that on my current portfolio.
What went badly was the time, its currently June that I am managing to write this blog up for final and for the next year I need to leave more time for larger projects. I may even structure it in a way to tackle 1 short tool then the remainder of May a much larger one. I also need a better editor for Maxscripting as I was always getting lost scrolling up lines to find where I was last, I ended up writing specific comments I could find then jump but it felt very tedious. I have tried the pinning features Max has but it never sticks after a reboot which defeats the overall purpose.
Regarding me though I need better structure in my parameters as there was a lot of times I called for the same thing but gave it another name elsewhere or forgot to change it to another instance breaking the chain. As my scripting is in a very debug state until I compile a good rollout UI, I decide not to rename values as it’ll break my functions. I need better housekeeping of these names to avoid this large issue in the future for cleaner code. Overall, I’m quite satisfied with the challenge and can’t wait to jump into the remainder of June to learn more. I want to tackle some proceduralism with Houdini in June (ProcedeJune?) or more Python and engine work as I miss it tremendously. I also will find it much easier to sort visually by returning to a node-based interface in Houdini. Anyways thank you for the read, I hope you stay tuned for my next shenanigans!
Bibliography:
Viktoriia Zavhorodnia (akbutea) (2022). Stylized Fluffy Trees Tutorial. [online] YouTube. Available at: https://www.youtube.com/watch?v=1BfZSfX6_Go [Accessed 20 May. 2025].
Silya (2023). stylized tree studies, which ones do you guys think are adorable and not? thanks! [online] Reddit.com. Available at: https://www.reddit.com/r/Illustration/comments/182echu/stylized_tree_studies_which_ones_do_you_guys/ [Accessed 22 May. 2025].
Autodesk (2024a). Line Spline Maxscript. [online] Autodesk.com. Available at: https://help.autodesk.com/view/MAXDEV/2024/ENU/?guid=GUID-B2A4BCD6-2A44-4C6E-BA95-0EF67D80448B [Accessed 22 May. 2025].
barigazy (2013). How to get a vertex-s normal informations???? | ScriptSpot. [online] Scriptspot.com. Available at: https://www.scriptspot.com/forums/3ds-max/general-scripting/how-to-get-a-vertex-s-normal-informations [Accessed 22 May. 2025].
Tidal Flask Studio (2024). FANTASTIC - Village Pack. [online] Fab.com. Available at: https://www.fab.com/listings/52529a12-e88e-41a0-8834-b87306f20c24.
Noorms, N. (2019). Noors Normal Thief | ScriptSpot. [online] Scriptspot.com. Available at: https://www.scriptspot.com/3ds-max/scripts/noors-normal-thief [Accessed 22 May. 2025].
HashBrownHamish, H. (2017). Working normal thief for 3ds max 2018 ? [online] polycount . Available at: https://polycount.com/discussion/193855/working-normal-thief-for-3ds-max-2018 [Accessed 23 May. 2025].
Autodesk (2024c). Push Modifier Maxscript. [online] Autodesk.com. Available at: https://help.autodesk.com/view/MAXDEV/2024/ENU/?guid=GUID-A0A17AF5-7AC2-4BF7-BD29-A9E27D11EB99 [Accessed 20 May. 2025].
Autodesk (2025d). Volume Select Modifier Maxscript. [online] Autodesk.com. Available at: https://help.autodesk.com/view/MAXDEV/2025/ENU/?guid=GUID-0B989D70-AD07-447F-812C-A96791910C21 [Accessed 22 May. 2025].


Comments